
Setup Jenkins on Red-hat Linux EC2 instance

- Launch Red-hat Linux EC2 instance
- SSH into your instance with Terminal to connect with the instance
- Run this command to become a Root User
$ sudo su - #To become root user
4. Then Update the machine with this command
$ yum updat
5. Now check the java version, Linux machine comes with java installed.
$ java -version # to check java Version
$ yum remove java-1.8.0*       #To remove Java version ( java-1.8.0* is version, you can replace with your version )
6. if it’s not installed, you can install Java.
$ yum install java-11-openjdk-devel #To install java
7. After installation, Then you have to set the Home path of java.
First, find your Java Path, then add it, To find use the below Command
$ find /usr/lib/jvm/java-11.0.17 | head -n 3
$ whereis java
$ ls -l /usr/bin/java
$ ls -l /etc/alternatives/java #You will get path on this command after running above commands
This is my path, you will get your path, save the path for your next use.
/usr/lib/jvm/java-11-openjdk-11.0.17.0.8–2.el9_0.x86_64
You are in the root path, you need to switch to the homeopath to add the java path.
cd ~
Open this file, to add the path
$ vi .bash_profile # This is a file, where we will add path of java
after adding the path, it will look like this.
# .bash_profile
# Get the aliases and functions
if [ -f ~/.bashrc ]; then
. ~/.bashrc
fi
# User specific environment and startup programs
JAVA_HOME=/usr/lib/jvm/java-11-openjdk-11.0.17.0.8–2.el9_0.x86_64
PATH=$PATH:$JAVA_HOME:$HOME/bin
export PATH
Now exit, by using the ‘exit’, then login to root by
$ exit
$ sudo su -
now you can confirm path by running this
$ echo $JAVA_HOMEit will output the latest path.
We are done with java.
8. Now install Jenkins
Run these commands before Jenkins installation
yum install wget -y
sudo wget -O /etc/yum.repos.d/jenkins.repo https://pkg.jenkins.io/redhat-stable/jenkins.repo
sudo rpm --import https://pkg.jenkins.io/redhat-stable/jenkins.io.key
Now install Jenkins
yum install jenkins
Now let's check Jenkins service status and start
service jenkins status # to check status
service jenkins start #to start
service jenkins stop # to stop
9. Access Jenkins in Browser
you can use the public IP address of your instance, with port 8080
Make sure port 8080 is added to your instance security groups.
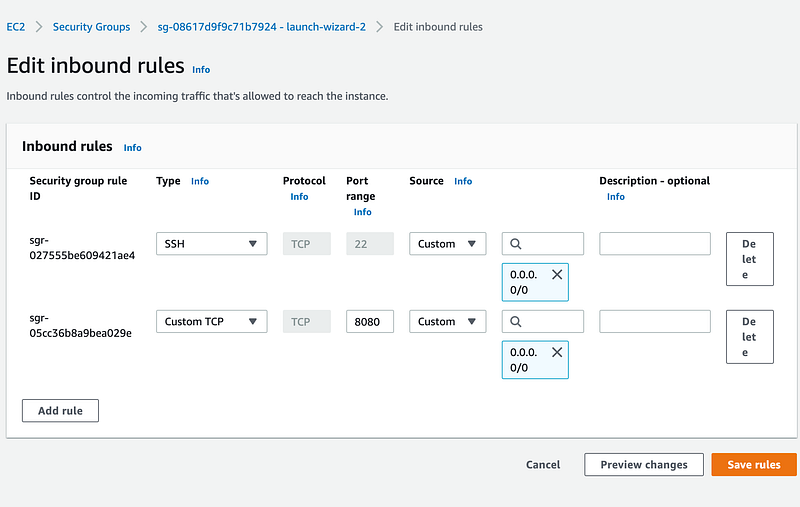
ipadress:8080. use it in browser
It will look like
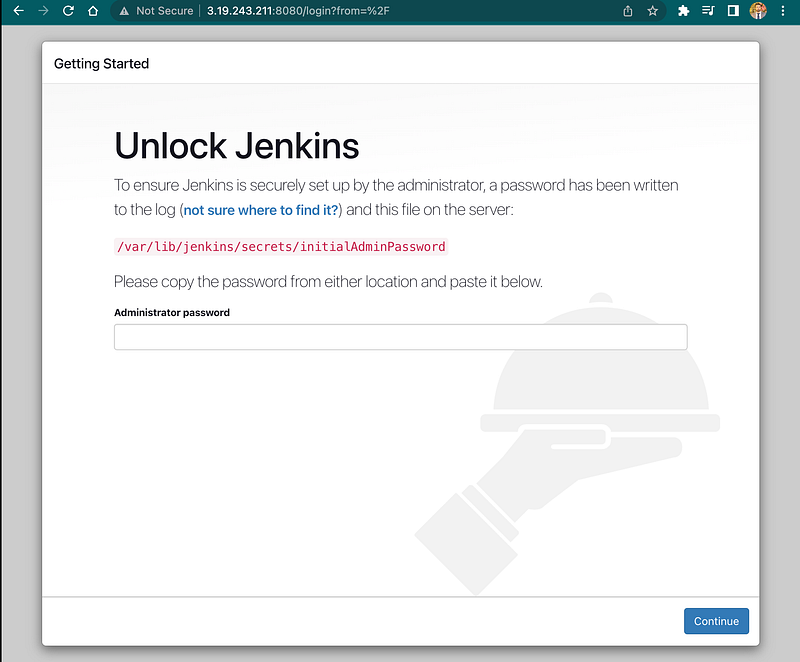
Now you will need to enter the Password:
To find Password, you can use the command given on this page.
like: /var/lib/jenkins/secrets/initialAdminPassword
$ cat /var/lib/jenkins/secrets/initialAdminPassword #you will get password10. Configuration on Jenkins
Just select install plugins.
After that go to the home page of Jenkins.
Add Java Path under Jenkins configuration
Manage Jenkins -> Global Tool Configuration and add JDK.
You will need to add a custom path, that you have already,
you can find it with this command
$find / -name javac
/usr/lib/jvm/java-11-openjdk-11.0.17.0.8–2.el9_0.x86_64
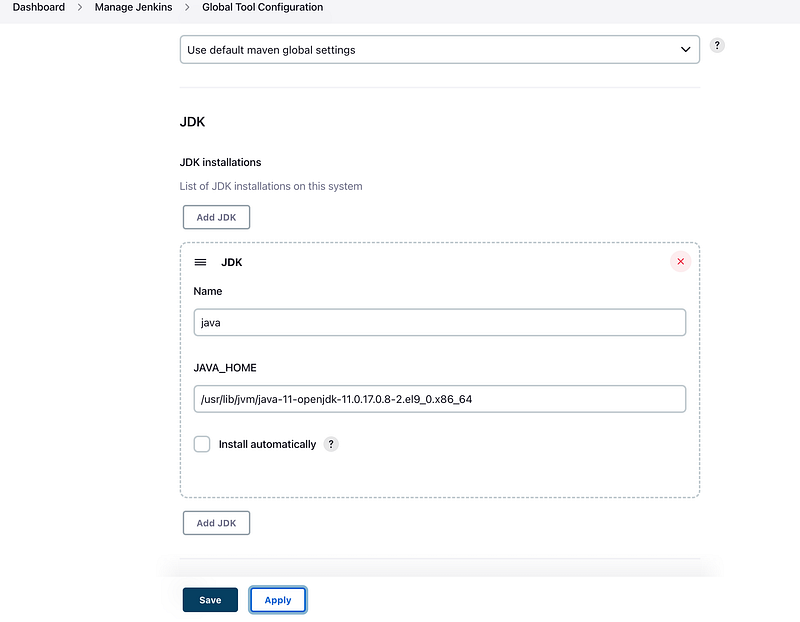
Then just click on Apply. Done
11. Run a Test Job
- create a new item
- Enter an item name -hello-jenkins
- choose freestyle project
- under build section ‘Execute shell: echo ‘hello jenkins”
- save your job
- build job
- check the console for output
Thanks for reading my article.