
DevOps Project: CI/CD Through Git, Jenkins and Tomcat

Before you get started, Make sure you have set up these things.
- Launch EC2 RedHat Linux instance
If you are done with these things, you are good to move. if not you can follow my articles to complete the above setups.
Now Let’s start with our DevOps project.
- Open Jenkins dashboard with ip_adress:8080.
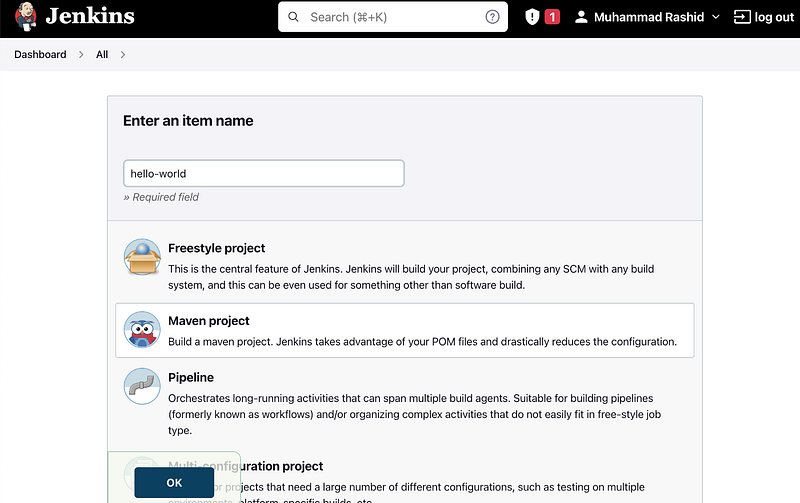
2. Create the First Job, which will be CI (Continuous integrations)
You can give any name to your job, and select Maven Project.
3. Git repo
Now add the git repo to this page, You can fork this repo and use it.
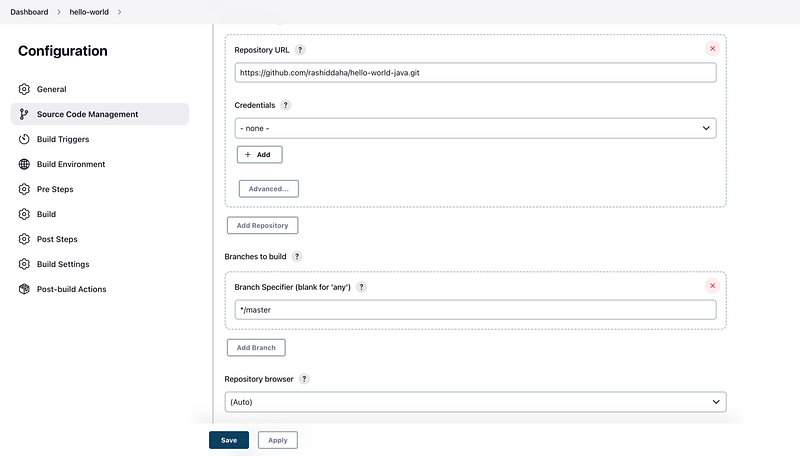
If your repo is public, then you don’t need to add Credentials.
if it’s private, you can follow this to add Credentials
Home -> Manage Jenkins-> credentials-> system-> Global credentials -> + add credentials
4. Build
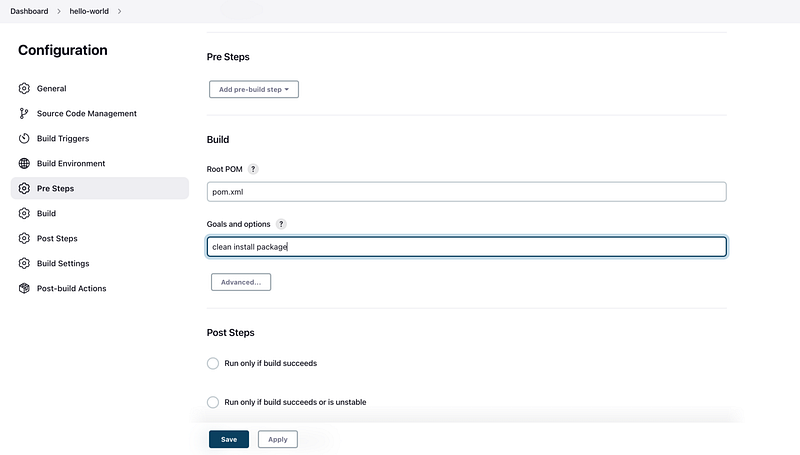
After this, you can click on apply and save.
Now CI is done, now we can build out the hello-world pipeline.
Go to dashboard -> pipeline -> build now from the side menu
Now CI is fine if the build succeeds.
5. Now ssh to your EC2 instance
Access the tomcat server from the browser, and make sure tomcat is up.
We will deploy our web app on Tomcat, so we will set up the tomcat configuration into Jenkins and also install deploy plugins on Jenkins.
First Install the deploy plugin
Manage Jenkins -> Manage Plugins-> search deploy to container Plugin.
Second, add credentials.
Home -> Manage Jenkins-> credentials-> system-> Global credentials -> + add credentials
Note: if you have set up tomcat, and followed my tomcat setup article, you will know your credentials.

6. Configuration
Now go to your project pipeline (in my case it is hello-world)
Open configuration
Dashboard -> hello-world -> configure
Under post-build action, select deploy war/ear to a container
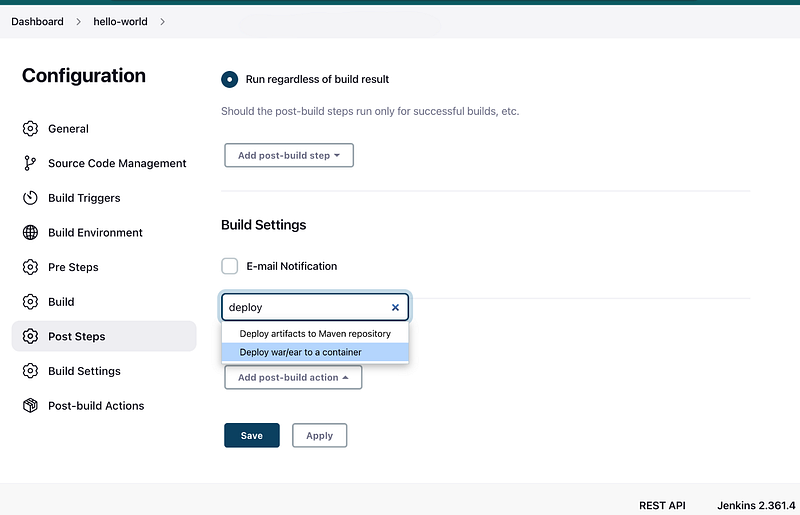
Now setup

after adding the tomcat URL and cred. you can apply and save.
7. Build now
Now go to the dashboard and your pipeline and build.
You can check the webapp in your tomcat folder.
sudo su -
cd /opt  # in my case main folder name is opt, you can remember your main folder name, when you setup tomcat
ls
cd apache-tomcat-8.5.84
ls
cd webapps
ls -ltr
you will get ouput like this
output:
total 12
drwxr-x---. 3 root root 4096 Nov 25 11:18 ROOT
drwxr-x---. 15 root root 4096 Nov 25 11:18 docs
drwxr-x---. 7 root root 99 Nov 25 11:18 examples
drwxr-x---. 6 root root 79 Nov 25 11:18 host-manager
drwxr-x---. 6 root root 114 Nov 25 11:18 manager
-rw-r-----. 1 root root 2358 Nov 26 09:13 webapp.war
drwxr-x---. 4 root root 54 Nov 26 09:13 webapp.If it’s webapp.war exists, it mean all is good.
now you can browse your web app using this URL
ip_address: 8090:/webapp/

We are done with deployment.
8. Now we will setup CI/CD because if code changes on GitHub, it should be automatically triggered, build and deploy.
Go to your pipeline job hello-world -> configuration -> Build Triggers
After every two minutes it will trigger . */2****
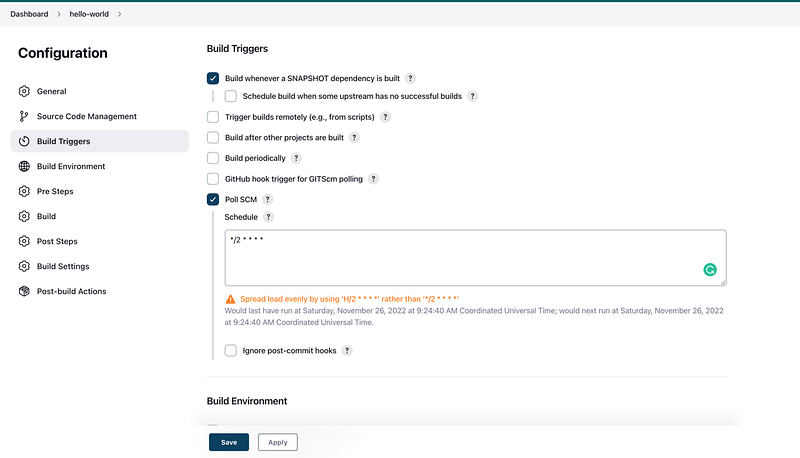
Apply and save.
Now go to your code and change something, and you will see results.
Congrats, you are done with your CI/CD setup.
If you Want to Learn Python, You can watch my ultimate Python Course on My Youtube Channel.
You can join there as well to share your Queries and suggestions. Facebook Facebook Group: https://web.facebook.com/groups/890525732087988/?mibextid=HsNCOg
You can Also Follow Me on My Social Media Platforms:
Thank You for reading!